

Bosses
 |
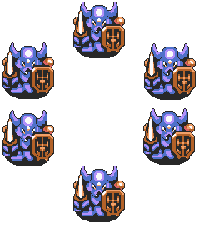
Mace KnightThe first boss you will encounter in Hyrule Castle, the Mace Knight. He will slowly approach you while twirling a ball and chain above his head. If you get close enough, he will throw it at you. You can use your newly aquired Boomerang to stun the Mace Knight long enough to get a hit in with your sword and run away.The second and easiest method is to avoid the Mace Knight for a moment. The cell next to Zelda's has three pots at the northern wall, so run in and grab one. Toss it at the Mace Knight and return for another pot. Hit him with the second and he should die, leaving behind the boss key. |
 |
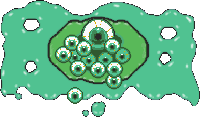
Armos KnightsThe Armos Knights of the Eastern Palace are a push over. As you enter the room, they will be still and standing in a circular fashion. Approach them and they will come to life. You will want to position yourself between the door and eastern wall.The Armos Knights will jump in a circle, and eventually all form a straight line at the rear wall. Continuously fire arrows straight ahead and you will begin taking them out faster than they can reform the circle. What is left of them will eventually form a straight line on the northern wall, so fire arrows at them. Once you have one remaining Knight, it will turn red and begin jumping at you. Once it is overhead, step away from its shadow and turn to it. Fire an arrow as it lands or use your sword to attack it. Prepare to run away as it will leap after you again. Rinse and repeat. |
 |
LanmolasThe Lanmola are your next annoyance. There are three burrowed in the sands of the arena, and it is obvious where they are at when they are about to surface. Run to a closely emerging Lanmola and stand next to it at either the north, south, east or west.When it emerges, rock will fly out from the four diagonal directions, so avoid this. Hit its head with your sword or with the Ice Rod when it surfaces or is leaping across the screen to deal out damage. Eventually, you will be left to defeat one last Lanmola, and this is where is gets a little harder. The last Lanmola will fire rocks in the four diagonal directions and in the four cardinal directions! You have to stand in the diagonal of the diagonal directions to avoid them, which is pretty hard. Hit its head as it emerges or is flying across the screen as usual and finish it off. |
 |
MoldormMoldorm is a real pain, no easy way around this one. There is very little flooring to fight this battle on, and if you fall down the pit to the sides, you will be dropped down a few floors, forcing you to climb back up and restart the battle.There is a smaller block of floor missing off the left side of the arena. You can use that to hide from Moldorm when you need a break or some time to sit back and watch things. Moldorms only weak spot is its tail, and getting to its tail is hard. If he hits you, you most likely will be pushed off the edge. When Moldorm gets close, circle him and he will try to follow. When he is turned, attack its tail and run away for a breather. Repeat, tricking him up with your movements to gain time to attack its tail. Eventually, you will piss him off and he will move very fast. Hide near the missing floor and jump out to attack when you have ample time. There's no easy way to do this, just try to avoid being knocked off the edge and keep your cool. |
 |
AgahnimAgahnim should be pretty easy to beat, atleast, the first time around with him that is. Agahnim will warp around the room and stop to fire energy attacks at you. He will fire two very common attacks, and another every once in awhile.If Agahnim fires a red energy ball attack at you, deflect it back at him with your Master Sword. It will hit causing damage. If he fires a strange looking blue attack, dodge it and watch for it to break up, as it can still cause damage. Now usually, wherever you move around the room, Agahnim will continue to watch you. If he stops at the top, middle of the screen and no longer follows you, stand to the northern wall to the left or right of him. He will fire a blast of lightening that causes good damage and covers a good portion of the room. Focus on returning the red energy attacks back at Agahnim to destroy him and win the first battle. After which, you will be magically warped to the Dark World in an attempt to seal you away there forever! |
 |
HelmasaurThis big fella is almost intimidating. He takes up a good portion of the room, so your only defensive movement will be to the left or right.The Helmasaur King will strafe side to side about three times randomly attacking at you with its tail. When he comes to a stop, he will release a red energy ball which explodes into three directions. Use the hammer and attack the strong mask on its face or try laying bombs. When the mask breaks off, Helmasaur's weakspot will be revealed, he will also move faster and attack more often. You can try running in to attack its forehead with your sword, but arrows seem to be a much better battle strategy, seeing as how you can keep some distance from this foe. A few hits and Helmasaur will be a thing of the past. |
 |
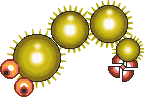
ArrghusArrghus is one ugly creature. When you begin this battle, he will move very slowly towards you, pausing every few seconds. Eventually, he will attempt to attack by spreading the puffy objects around him outward in circular motion. Retreat as far as you can to avoid this.Use the hookshot to pull the puffy objects off of Arrghus and attack them with your sword to destroy them. Continue this until you have removed and destroyed every puffed object around him. Arrghus will leap into the air and out of screen, so begin running around. He will land and start bouncing off the walls of the room. Charge your sword and release a spin attack when he comes close. He will leap back into the air, repeating the entire process. |
 |
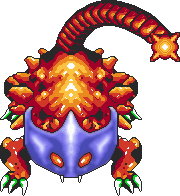
MothulaThe hardest part of this battle is avoiding the dangers in Mothula's room. Spikes cover the walls and will move around the room due to the moving floor. You have to dodge the moving spikes while you dodge Mothula's fireball attack, which can get diffecult!Mothula is very susceptible to fire, so attack him with the Fire Rod or Bombos, if you have it. After quite a few shots, Mothula will enter the dramatic explosion scene and leave behind crystal number 3! |
 |
BlindI suggest before you even enter Blind's dungeon that you get the Magic Cape from the graveyard and fill a few bottles with magic potion! Once you walk the young lady into the patch of light, she will turn into Blind!Use the cape to turn invisible (and invincible) and attack Blind's head continuously with your sword. Don't stop attacking! Eventually, Blind's head will come off and fly around the room shooting small fireballs at you and at random. Continue attacking Blind's head with your sword until you remove two more heads (now you know why I said to get the cape first). Keep up the attack on the last head and Blind will fail. |
 |
KholdstareWhen you enter the room, this boss will be no threat, as its frozen into a large ice mass (however, ice chunks will fall from the ceiling). Use the Bombos to free this boss or your fire rod (which is slower).There will be three of this guy, and they are pretty much a pushover. Use your magic cape and corner each boss using your sword. Attack wildly with your sword while each is in the corner to defeat them quick and easily. |
 |
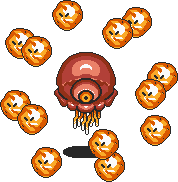
VitreousVitreous is pretty easy if you come prepared. The smaller eyeballs in Vitreous' membrane will come after you first, several at a time. Meanwhile, the larger eyeball will fire lightning attacks which are hard to dodge with the smaller guys on you.Put on the magic cape and attack the smaller eyes which bounce around right in front of you. They will continue coming, so continue putting them down with little effort. After you've destroyed each of the smaller eyes, the larger of them will charge after you. Attack it with your sword or use spin attacks to quicken this battle. |
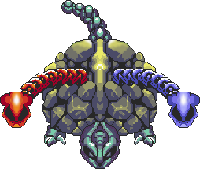 |
TrinexxTrinexx can be diffecult, but we've got your back! You will need alot of magic for this battle! Trinexx has three heads (hence the word 'Tri'). The red head's weakness is ice, while the blue heads weakness is fire.Line up with the blue head (he shoots ice, freezing the floor making it hard to move and dodge other attacks, so we will start with him) and start shooting your fire rod at him. Watch out for both other heads, as the red head will shoot streams of fire at you and the larger head will stretch in to bite you! After a few hits (about most of your magic meter), the blue head will explode. Now get out the ice rod and move on to the red head. Fight him as you did the blue headed creature, attacking with the ice rod and dodging the center head. After most of your magic meter is depleted, the red head will explode, then the center head will tuck into its shell and begin to explode. The center head will stay outside of its shell, almost like a snake. Certain parts of its center will light up, and thats the part of it you need to attack. I recommend putting on the magic cape to make this a fast, easy battle. Run in and wildly attack its weakness to finish him off. |
|
AgahnimTime to battle Agahnim for the second time, and it will be alittle more diffecult. You won't only have to deal with Agahnim, but with two clones of him as well!The battle is the same as it was the first time around; deflect the red energy balls back at Agahnim with your sword. It will obviously be abit harder to do as you will have all clones mimiking what Agahnim does, but that can also work to your advantage as you can deflect their attack back at Agahnim for some damage. A few hits and Agahnim will keel over defeated. |
 |
GanonNow for the main event. As soon as you drop in, hold up and run in before he talks to get a few cheap shots in. He will talk then the fight begins. Put on your magic cape and start attacking Ganon. Follow him wherever he warps too and keep up the attack.After quite a few hits, he will spin his weapon over his head creating a circle of firebats around him. They will fly off after you, so make sure you have enough magic to keep the cape going and keep up the attack. He will start warping from corner to corner and jumping to make blocks fall from the floor, starting from the edges and working their way inward. Follow Ganon and hit him every chance you get. Once hit enough, he will talk about the secret of darkness and the lights will go out. You wont be able to see Ganon and the more time you waste standing around the more he will attack. Light the torches on the sides of the room with the firrod and Ganon will reappear. Hit him with your sword and he'll turn blue. You don't have much time so fire a silver arrow into his chest and watch him die. |